Configure the basics
Set up shifts and employee information in several ways
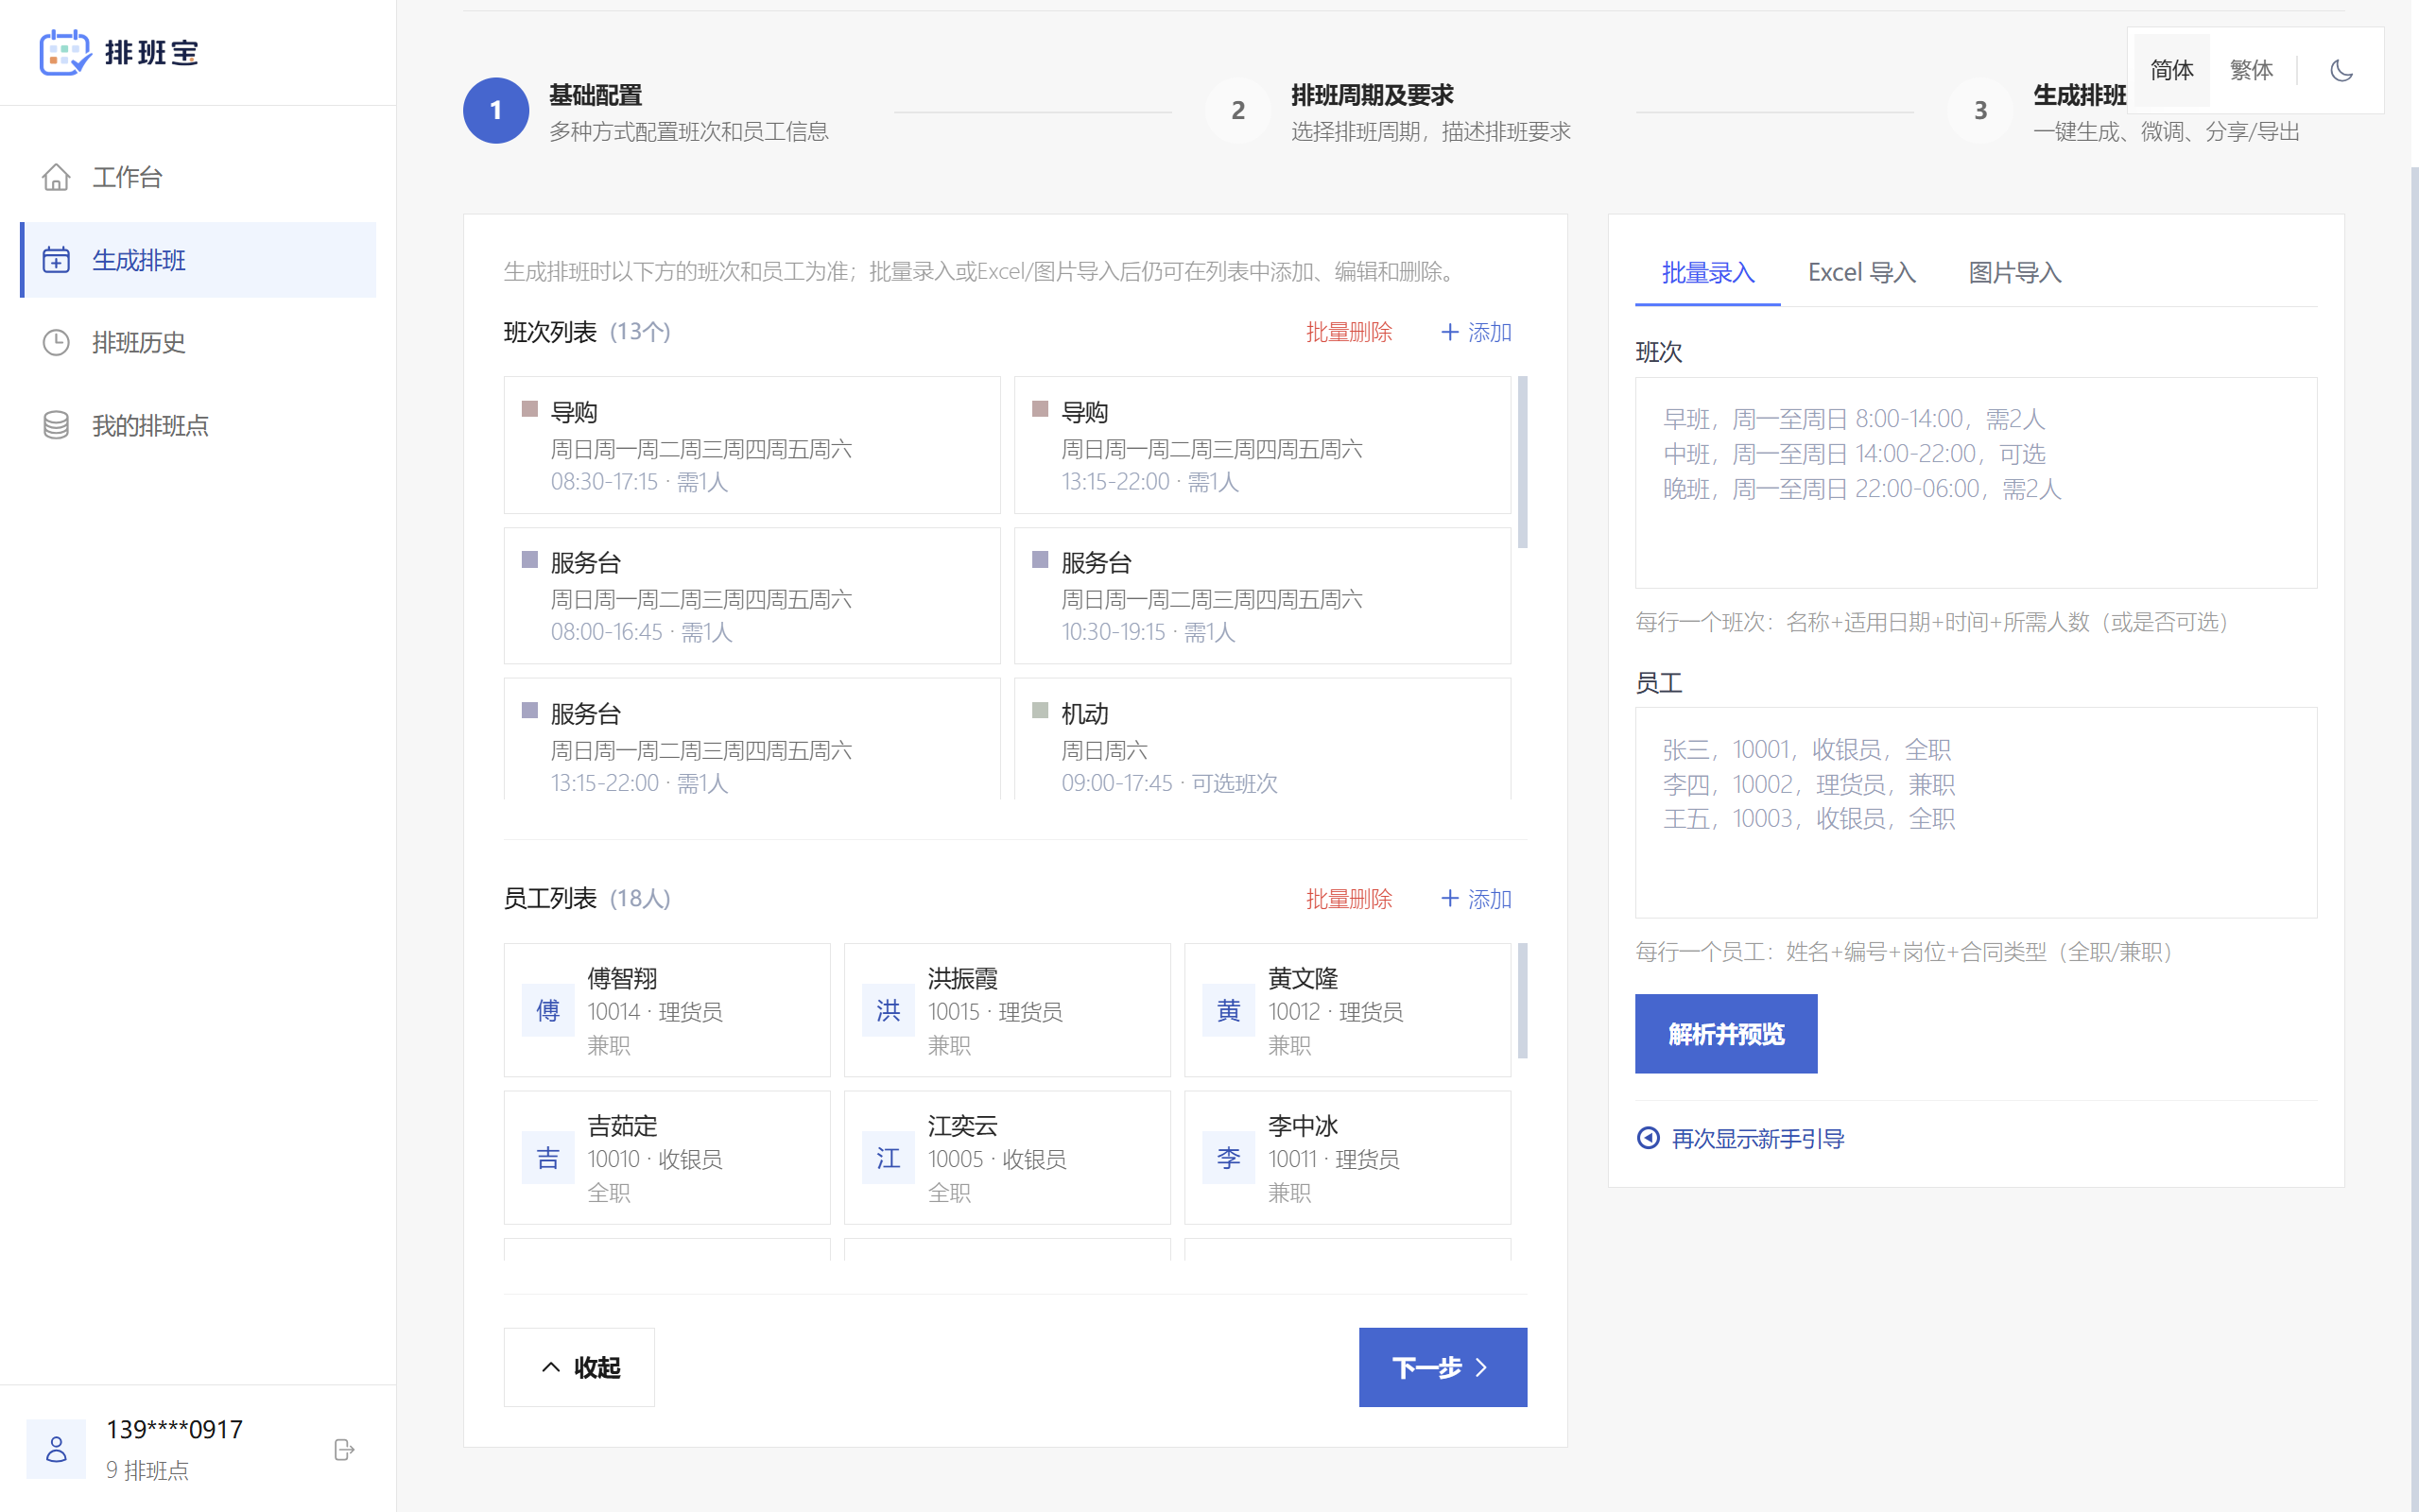
Click the “Add” button in the upper-right corner of the shift list. In the dialog, fill in the shift name, applicable days, start/end time, required staff (or whether the shift is optional), and color, then add it to the shift list;
Click the “Add” button in the upper-right corner of the employee list. In the dialog, fill in the employee name, code, and role, choose a contract type (full-time or part-time), then add the employee to the employee list;
More quick entry options:
- Batch entry: Enter multiple shift and employee records;
- Excel import: Upload an existing Excel roster for automatic parsing;
- Image import: Upload a photo/screenshot of an existing roster for automatic recognition;
When shifts and employees are ready, click the “Next” button to continue to the scheduling period and requirements step.
Period and requirements
Choose the scheduling period and describe the requirements
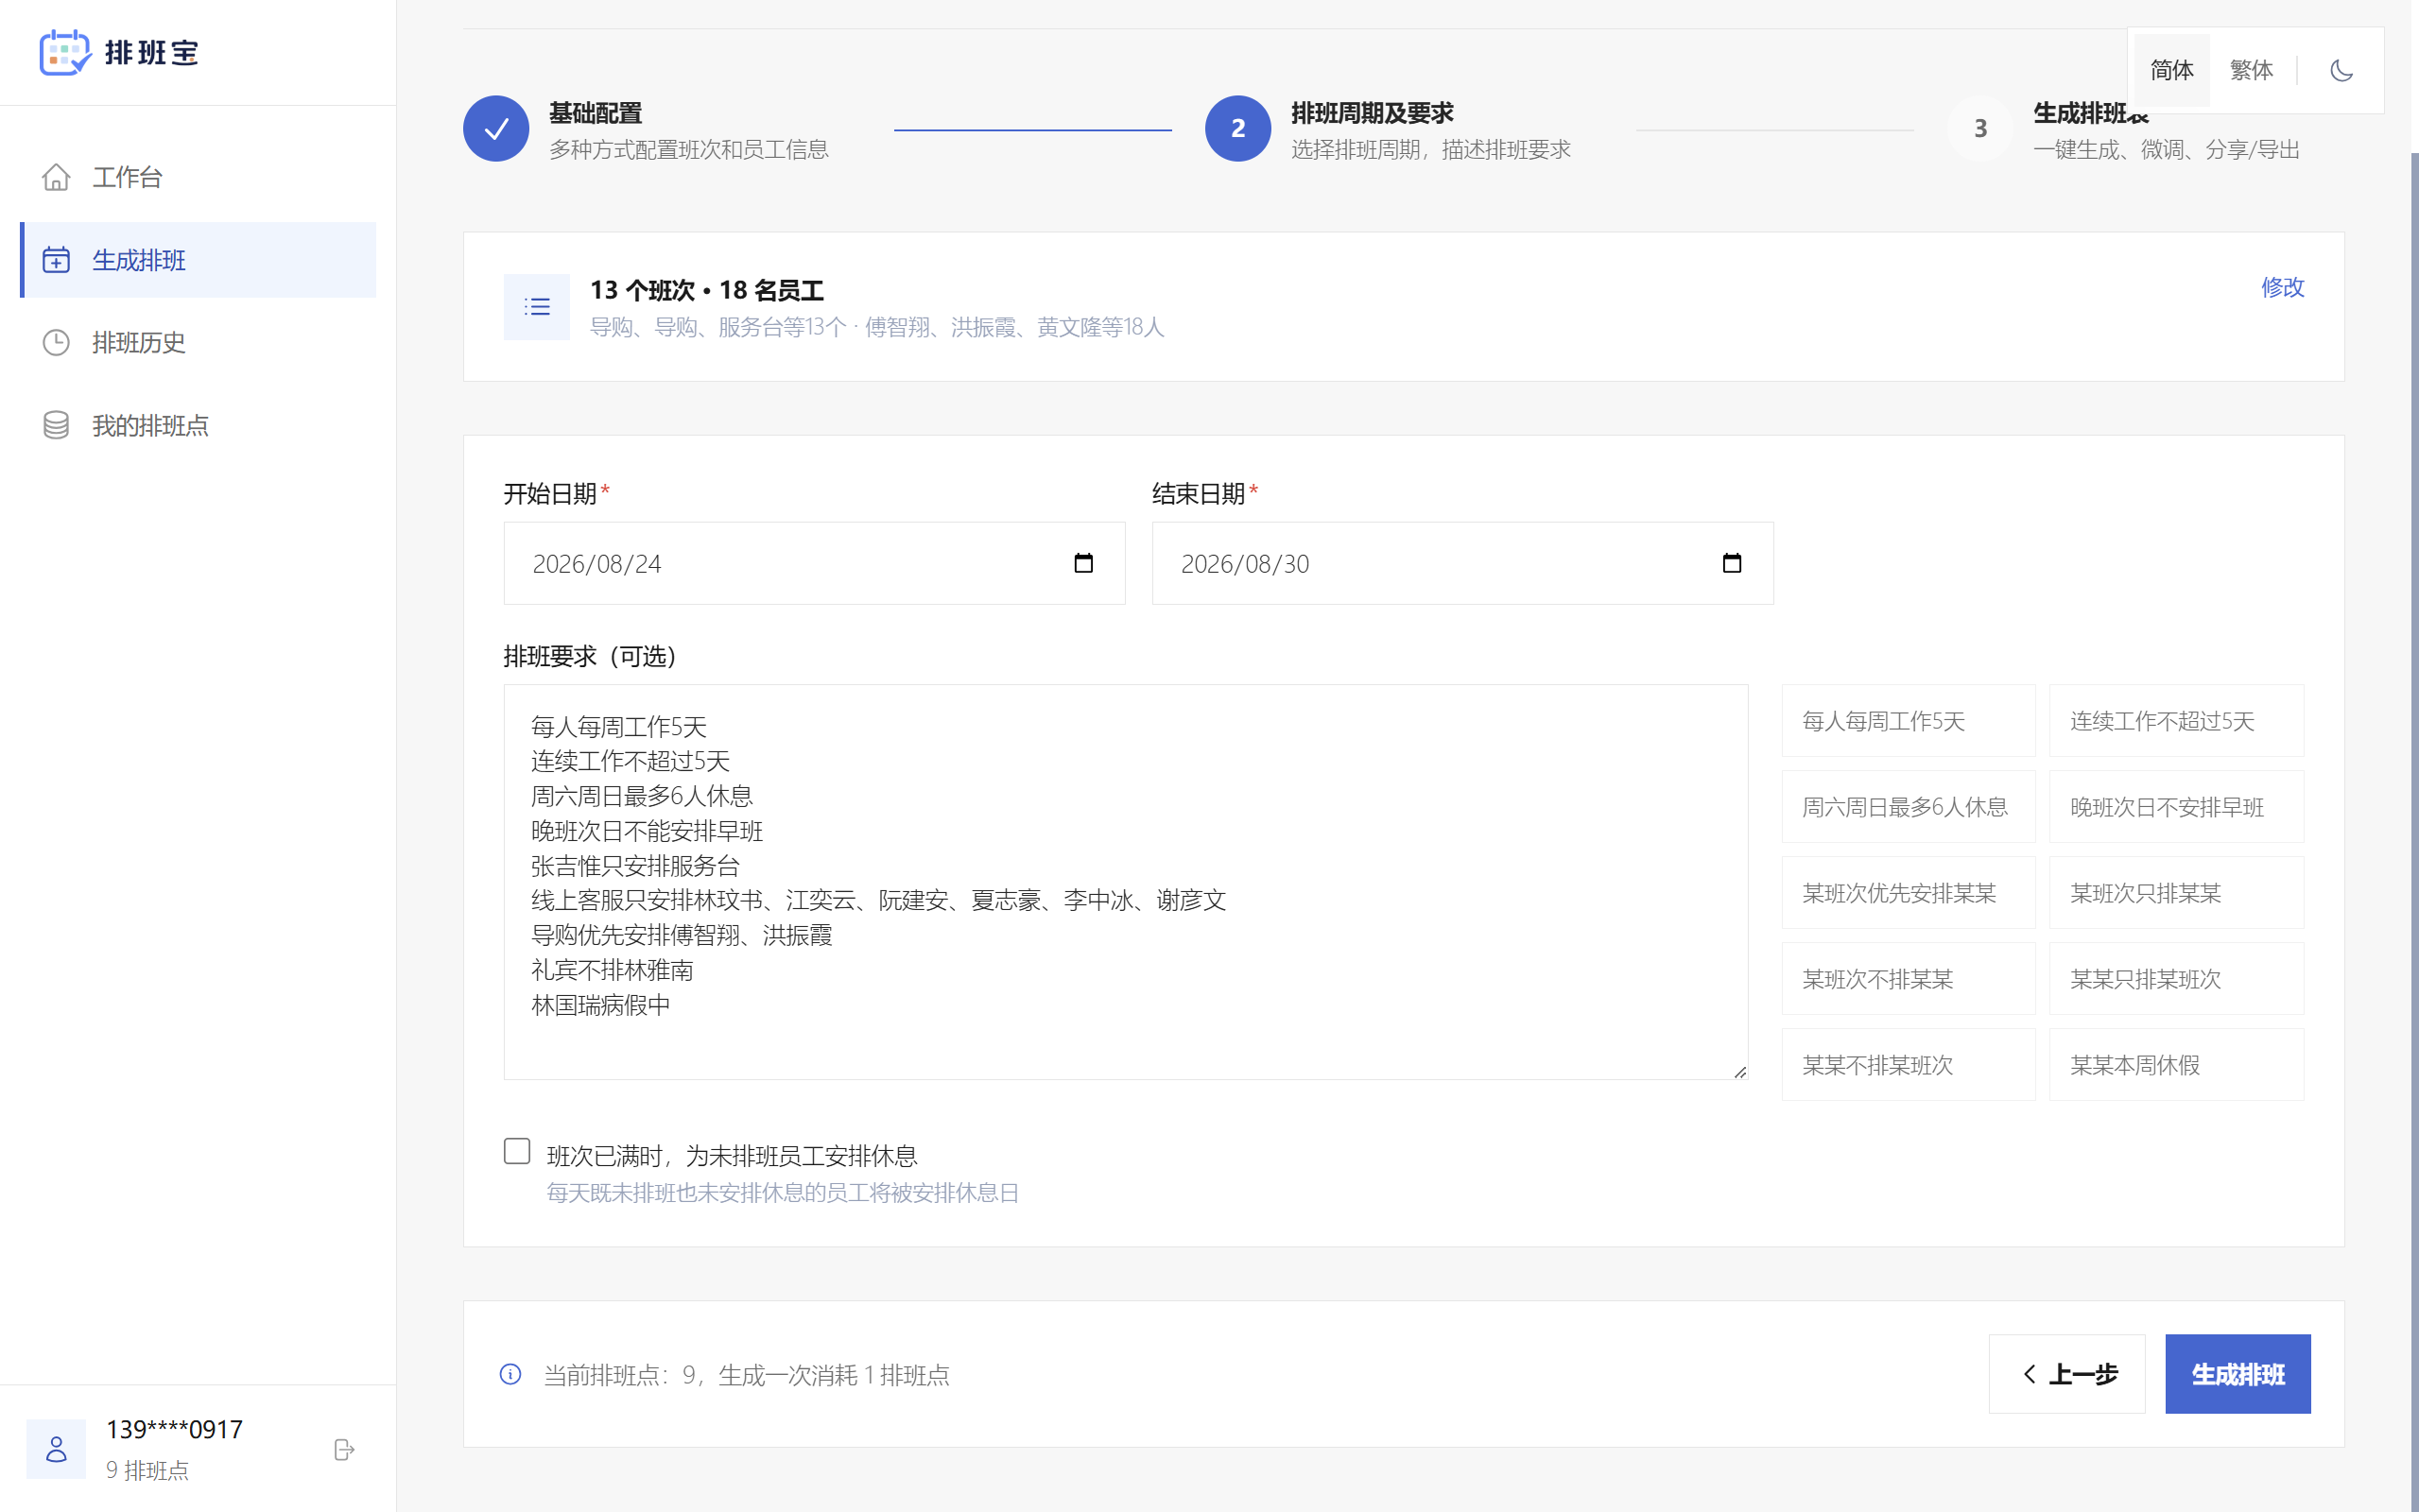
Choose a start date and end date, usually one week, two weeks, or one month;
Describe the scheduling requirements in natural language. The system automatically converts them into constraints;
Common requirements can be added quickly by clicking the quick-input buttons on the right, for example:
- Everyone works 5 days per week
- No more than 5 consecutive work days
- Prefer a certain employee for a shift
- Do not schedule a certain employee for a shift
- Only assign a certain shift to an employee
- An employee is on leave this week
When finished, click the “Generate schedule” button. The system combines AI and the constraint algorithm to generate the schedule result (expected wait: about 10 seconds).
Generate/manage the schedule
Generate, fine-tune, share, or export in one flow
After the schedule is generated, you can view it in table/calendar view, and it supports fine-tuning, sharing, and export:
Table view
Calendar view
Fine-tune
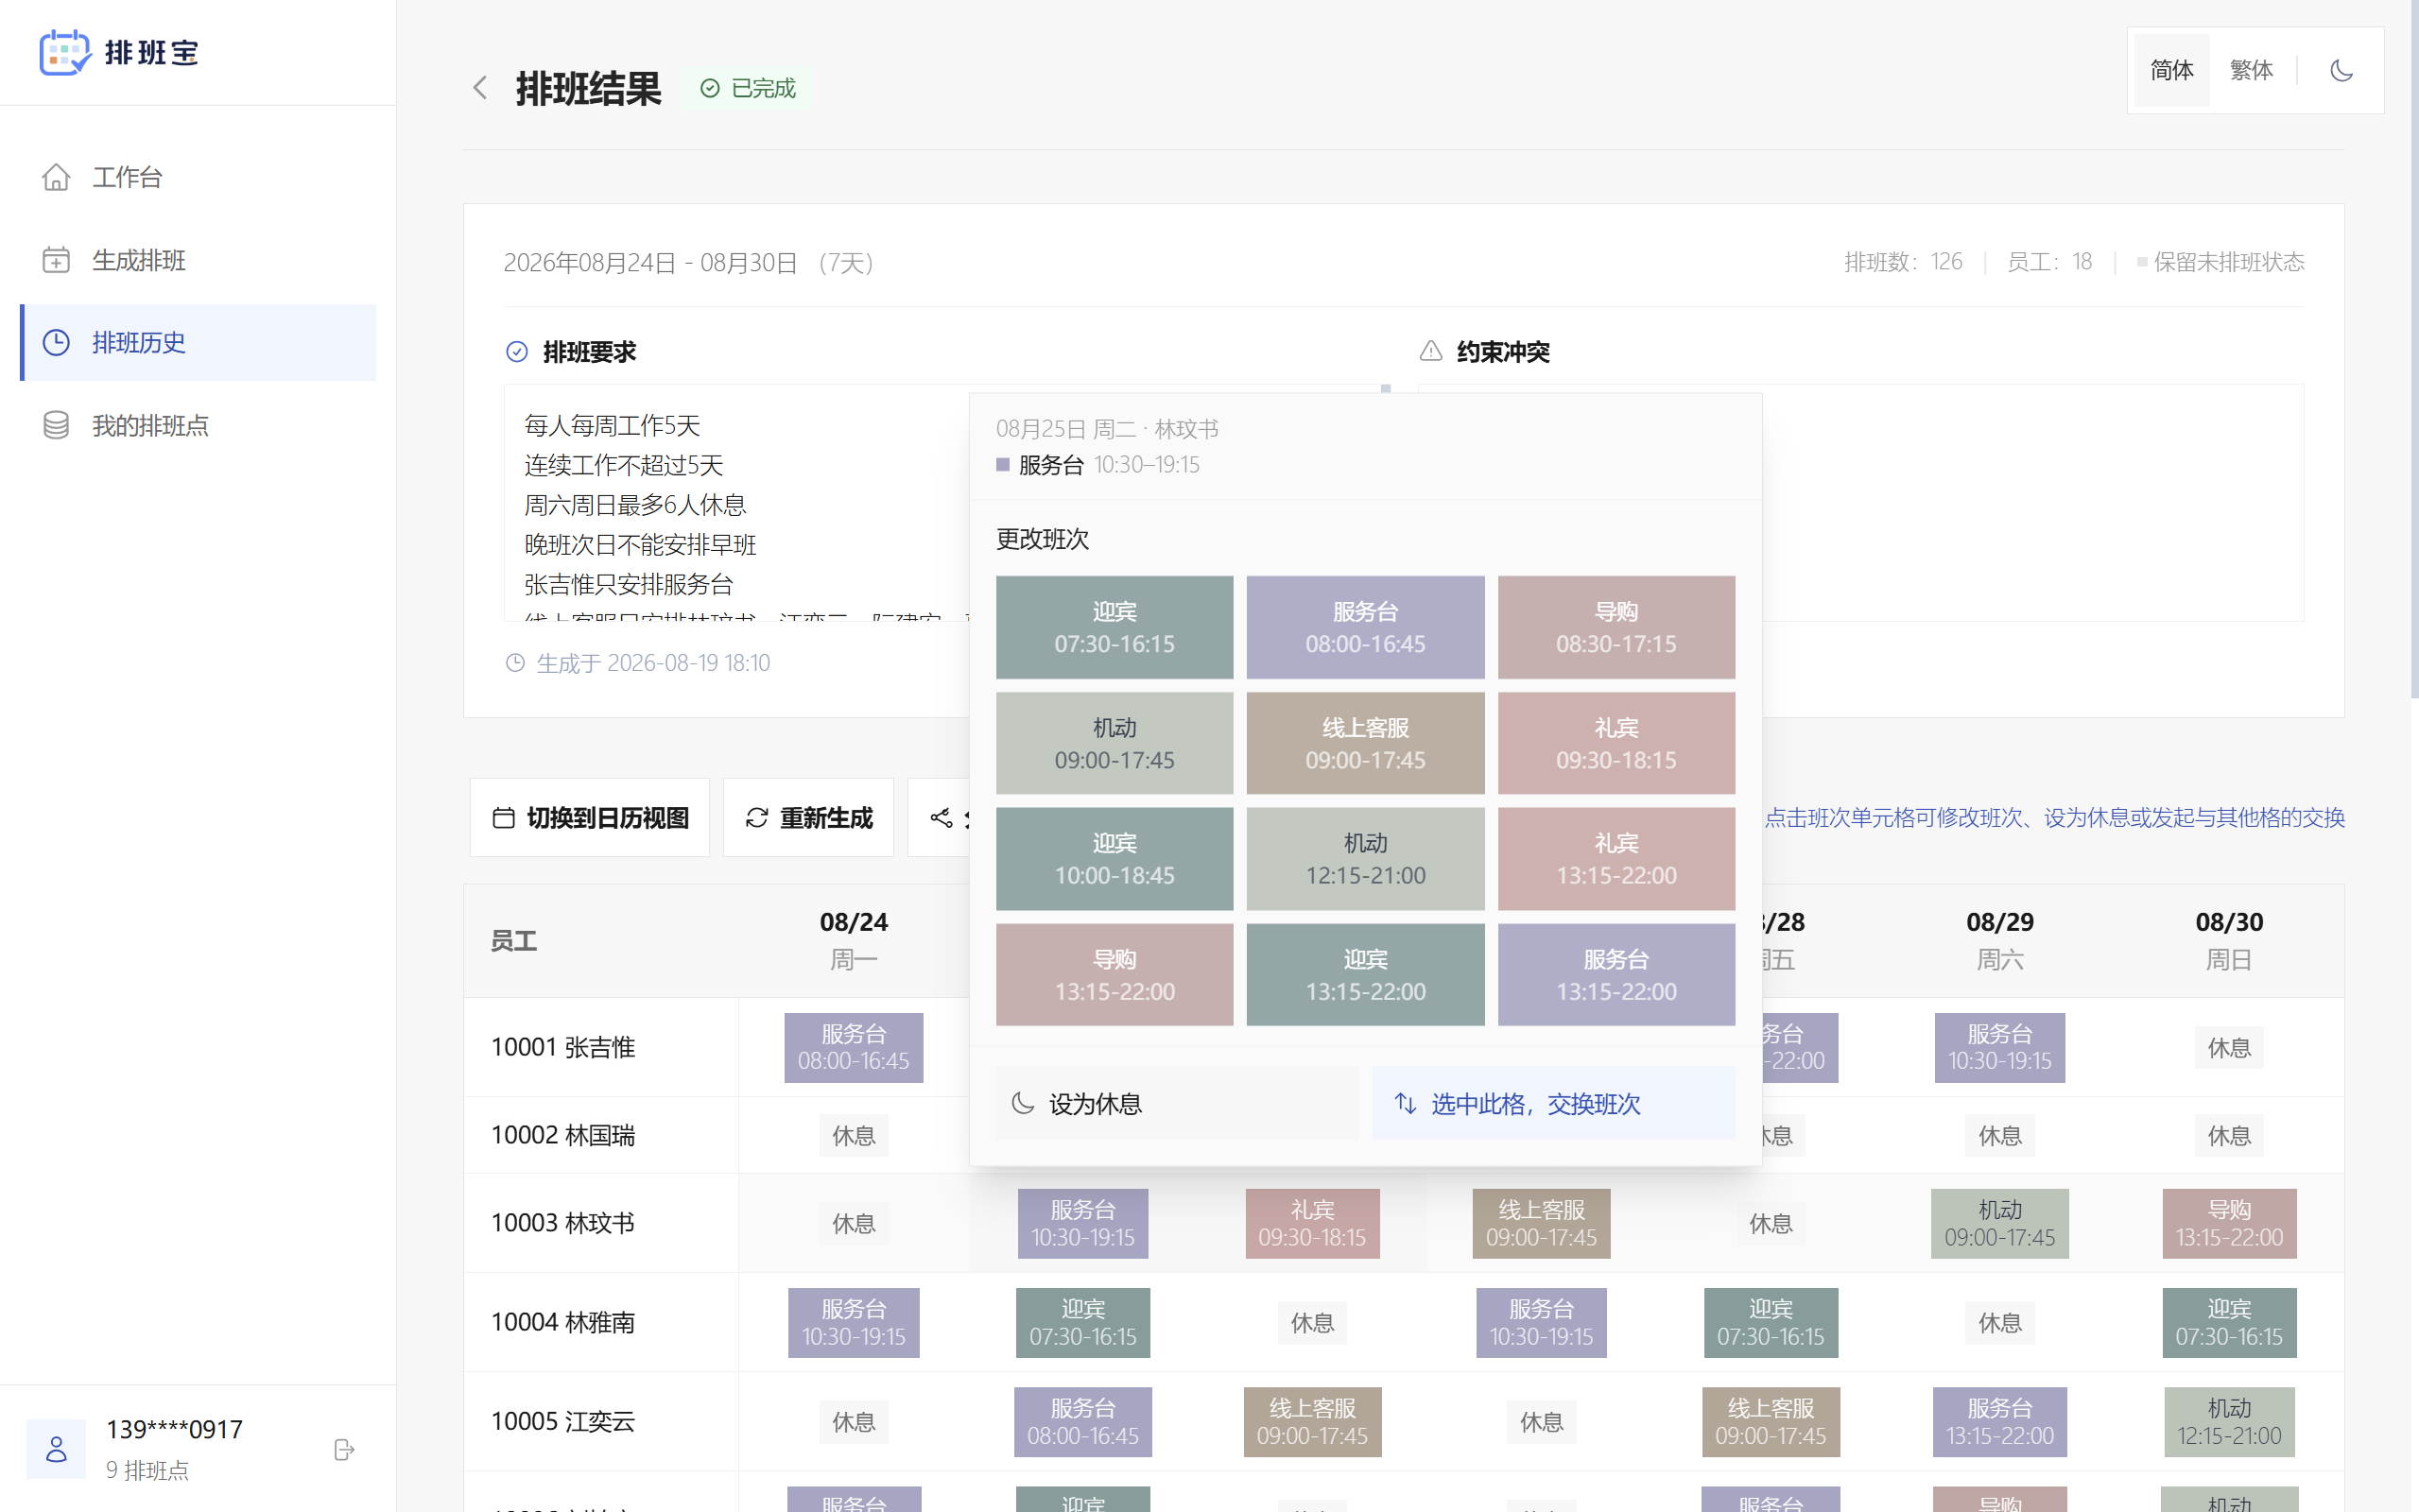
In table view, click a shift cell to change the shift or set it to rest in the dialog; In the dialog, click “Select this cell and swap shifts”. The shift becomes highlighted. Click another shift cell, then click “Confirm swap” in the confirmation dialog to exchange the two shifts.
Share
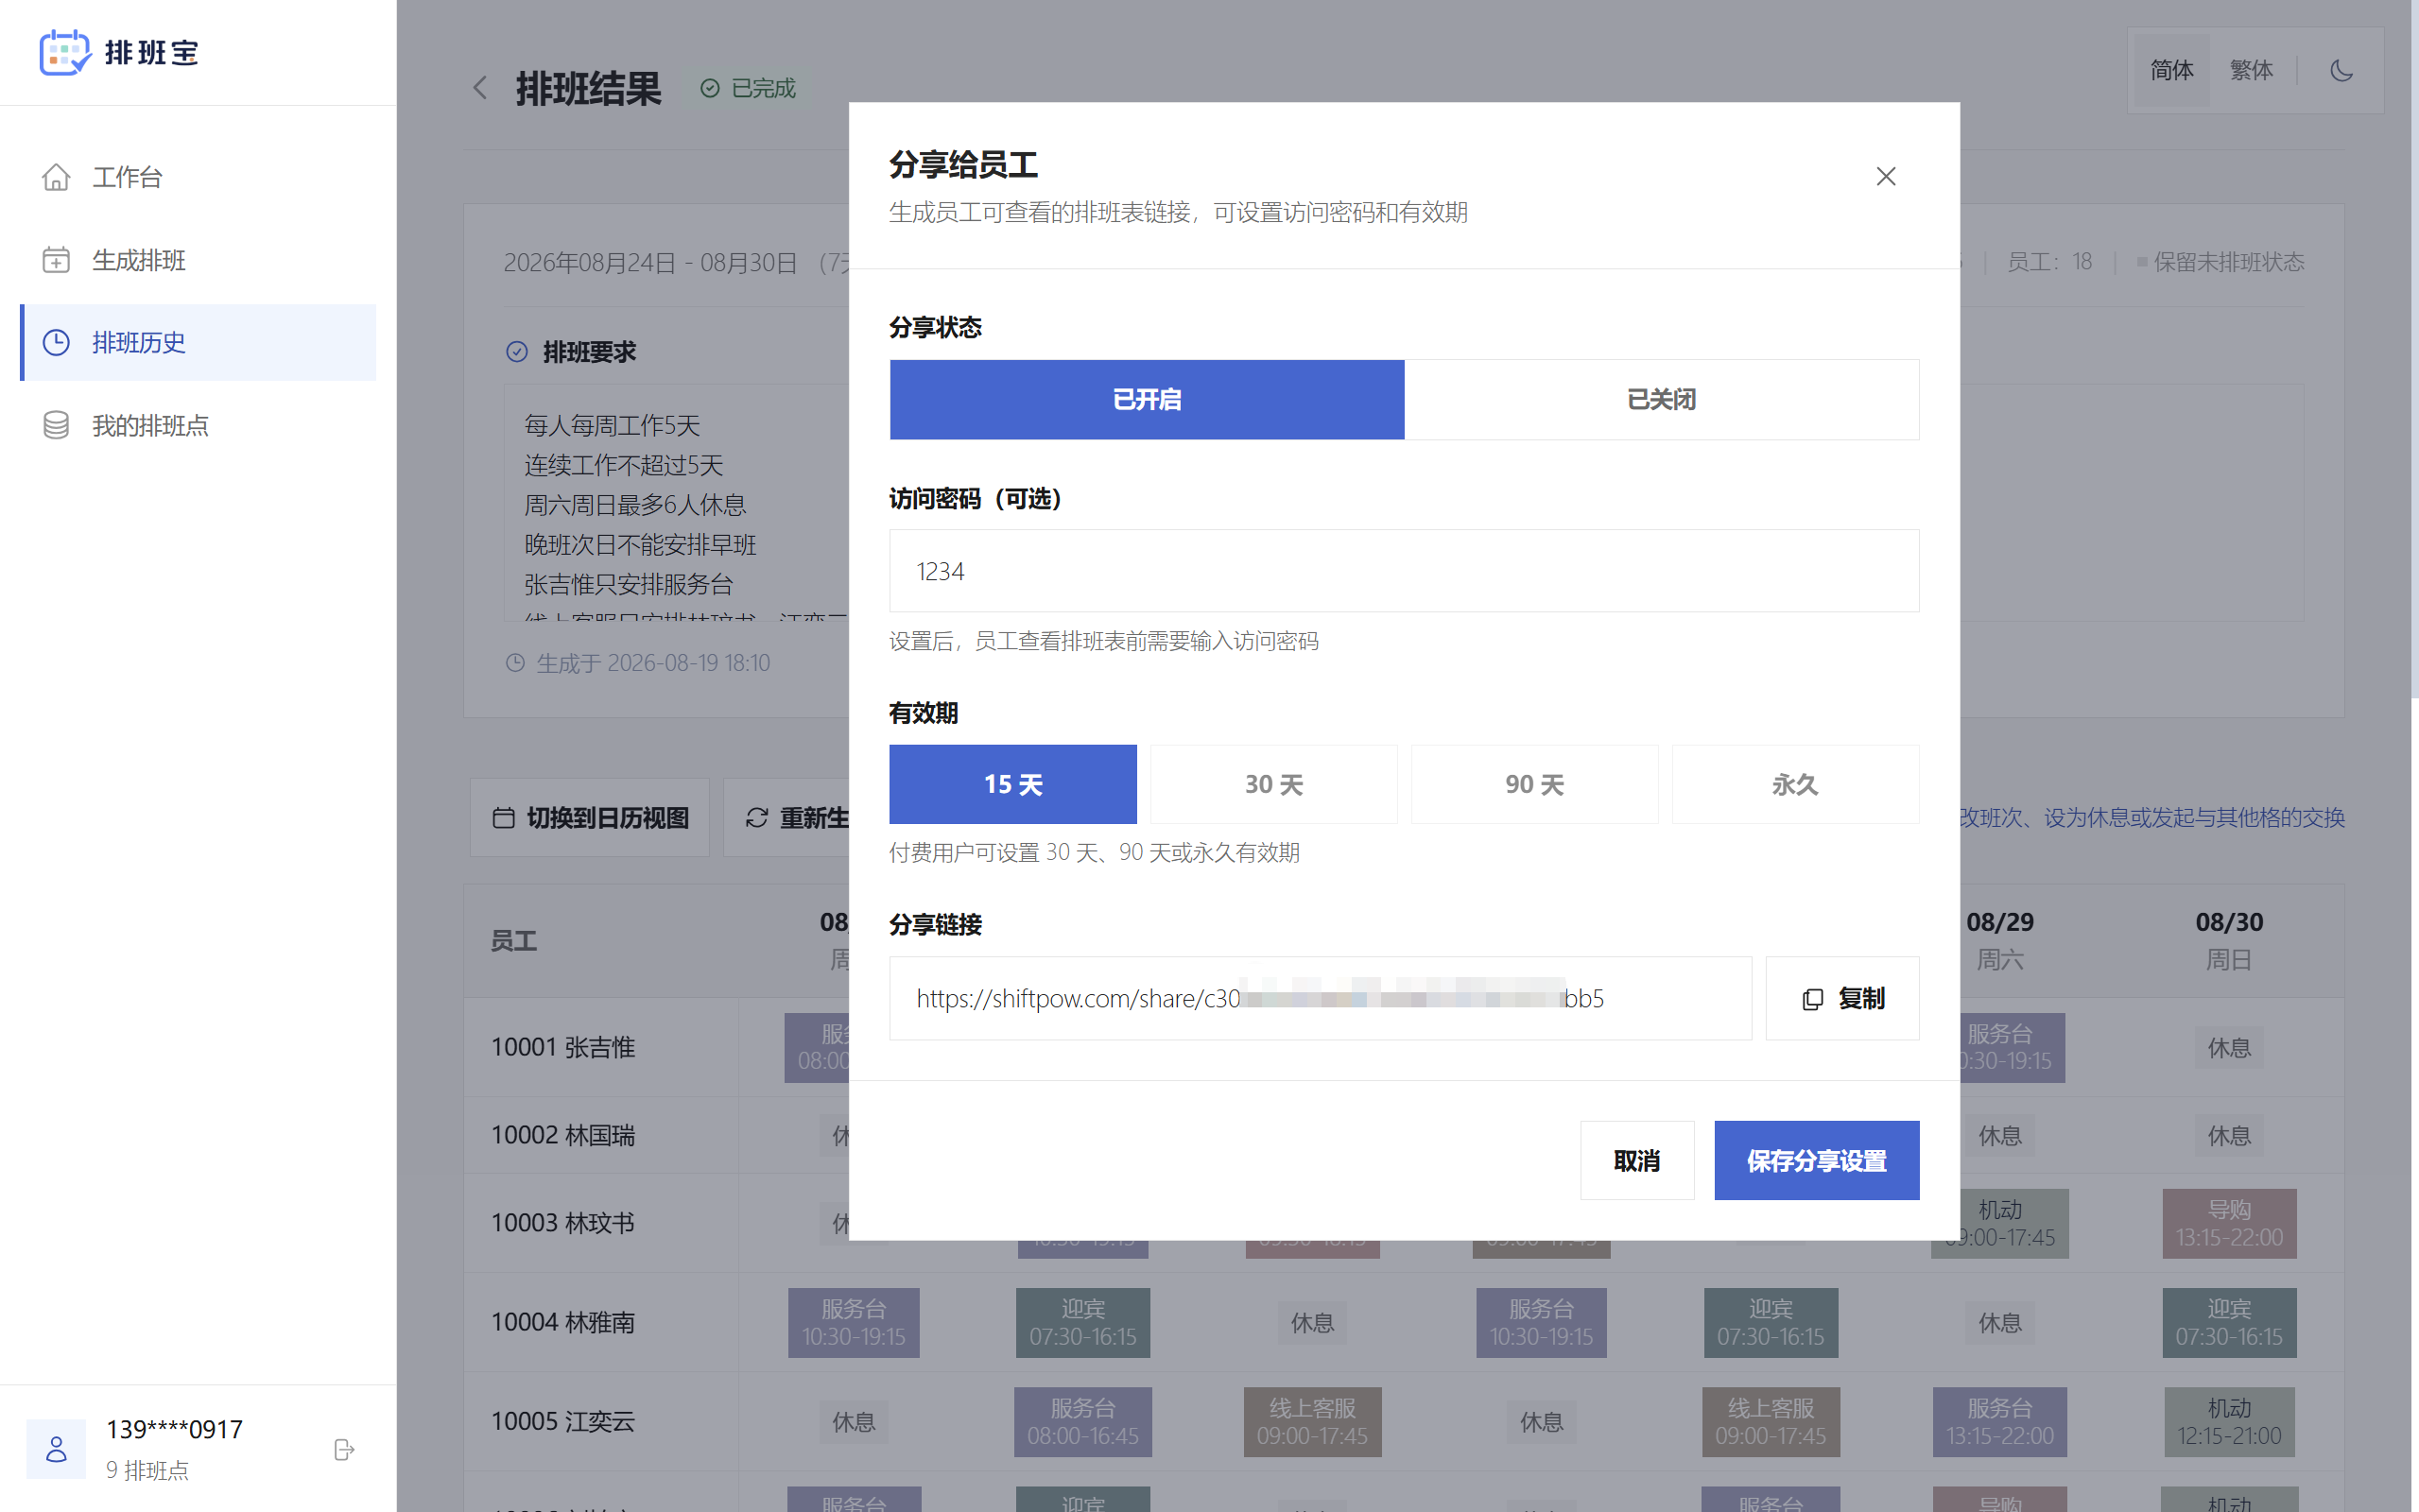
Click the “Share with employees” button in the upper-left corner of the schedule table. In the dialog, set the sharing status to “Enabled”, optionally set a 4-digit share password and a validity period, then click “Save sharing settings”. The system generates a share link that can be copied and sent to employees through WeChat, SMS, and other channels; Note: The default validity period is 15 days. Paid users can choose 30 days, 90 days, or forever. Employees can open the shared link to view the complete schedule. They can also enter their employee code or name to view their own shifts; Note: If a password was set when sharing, it must be entered before viewing the schedule.
Export
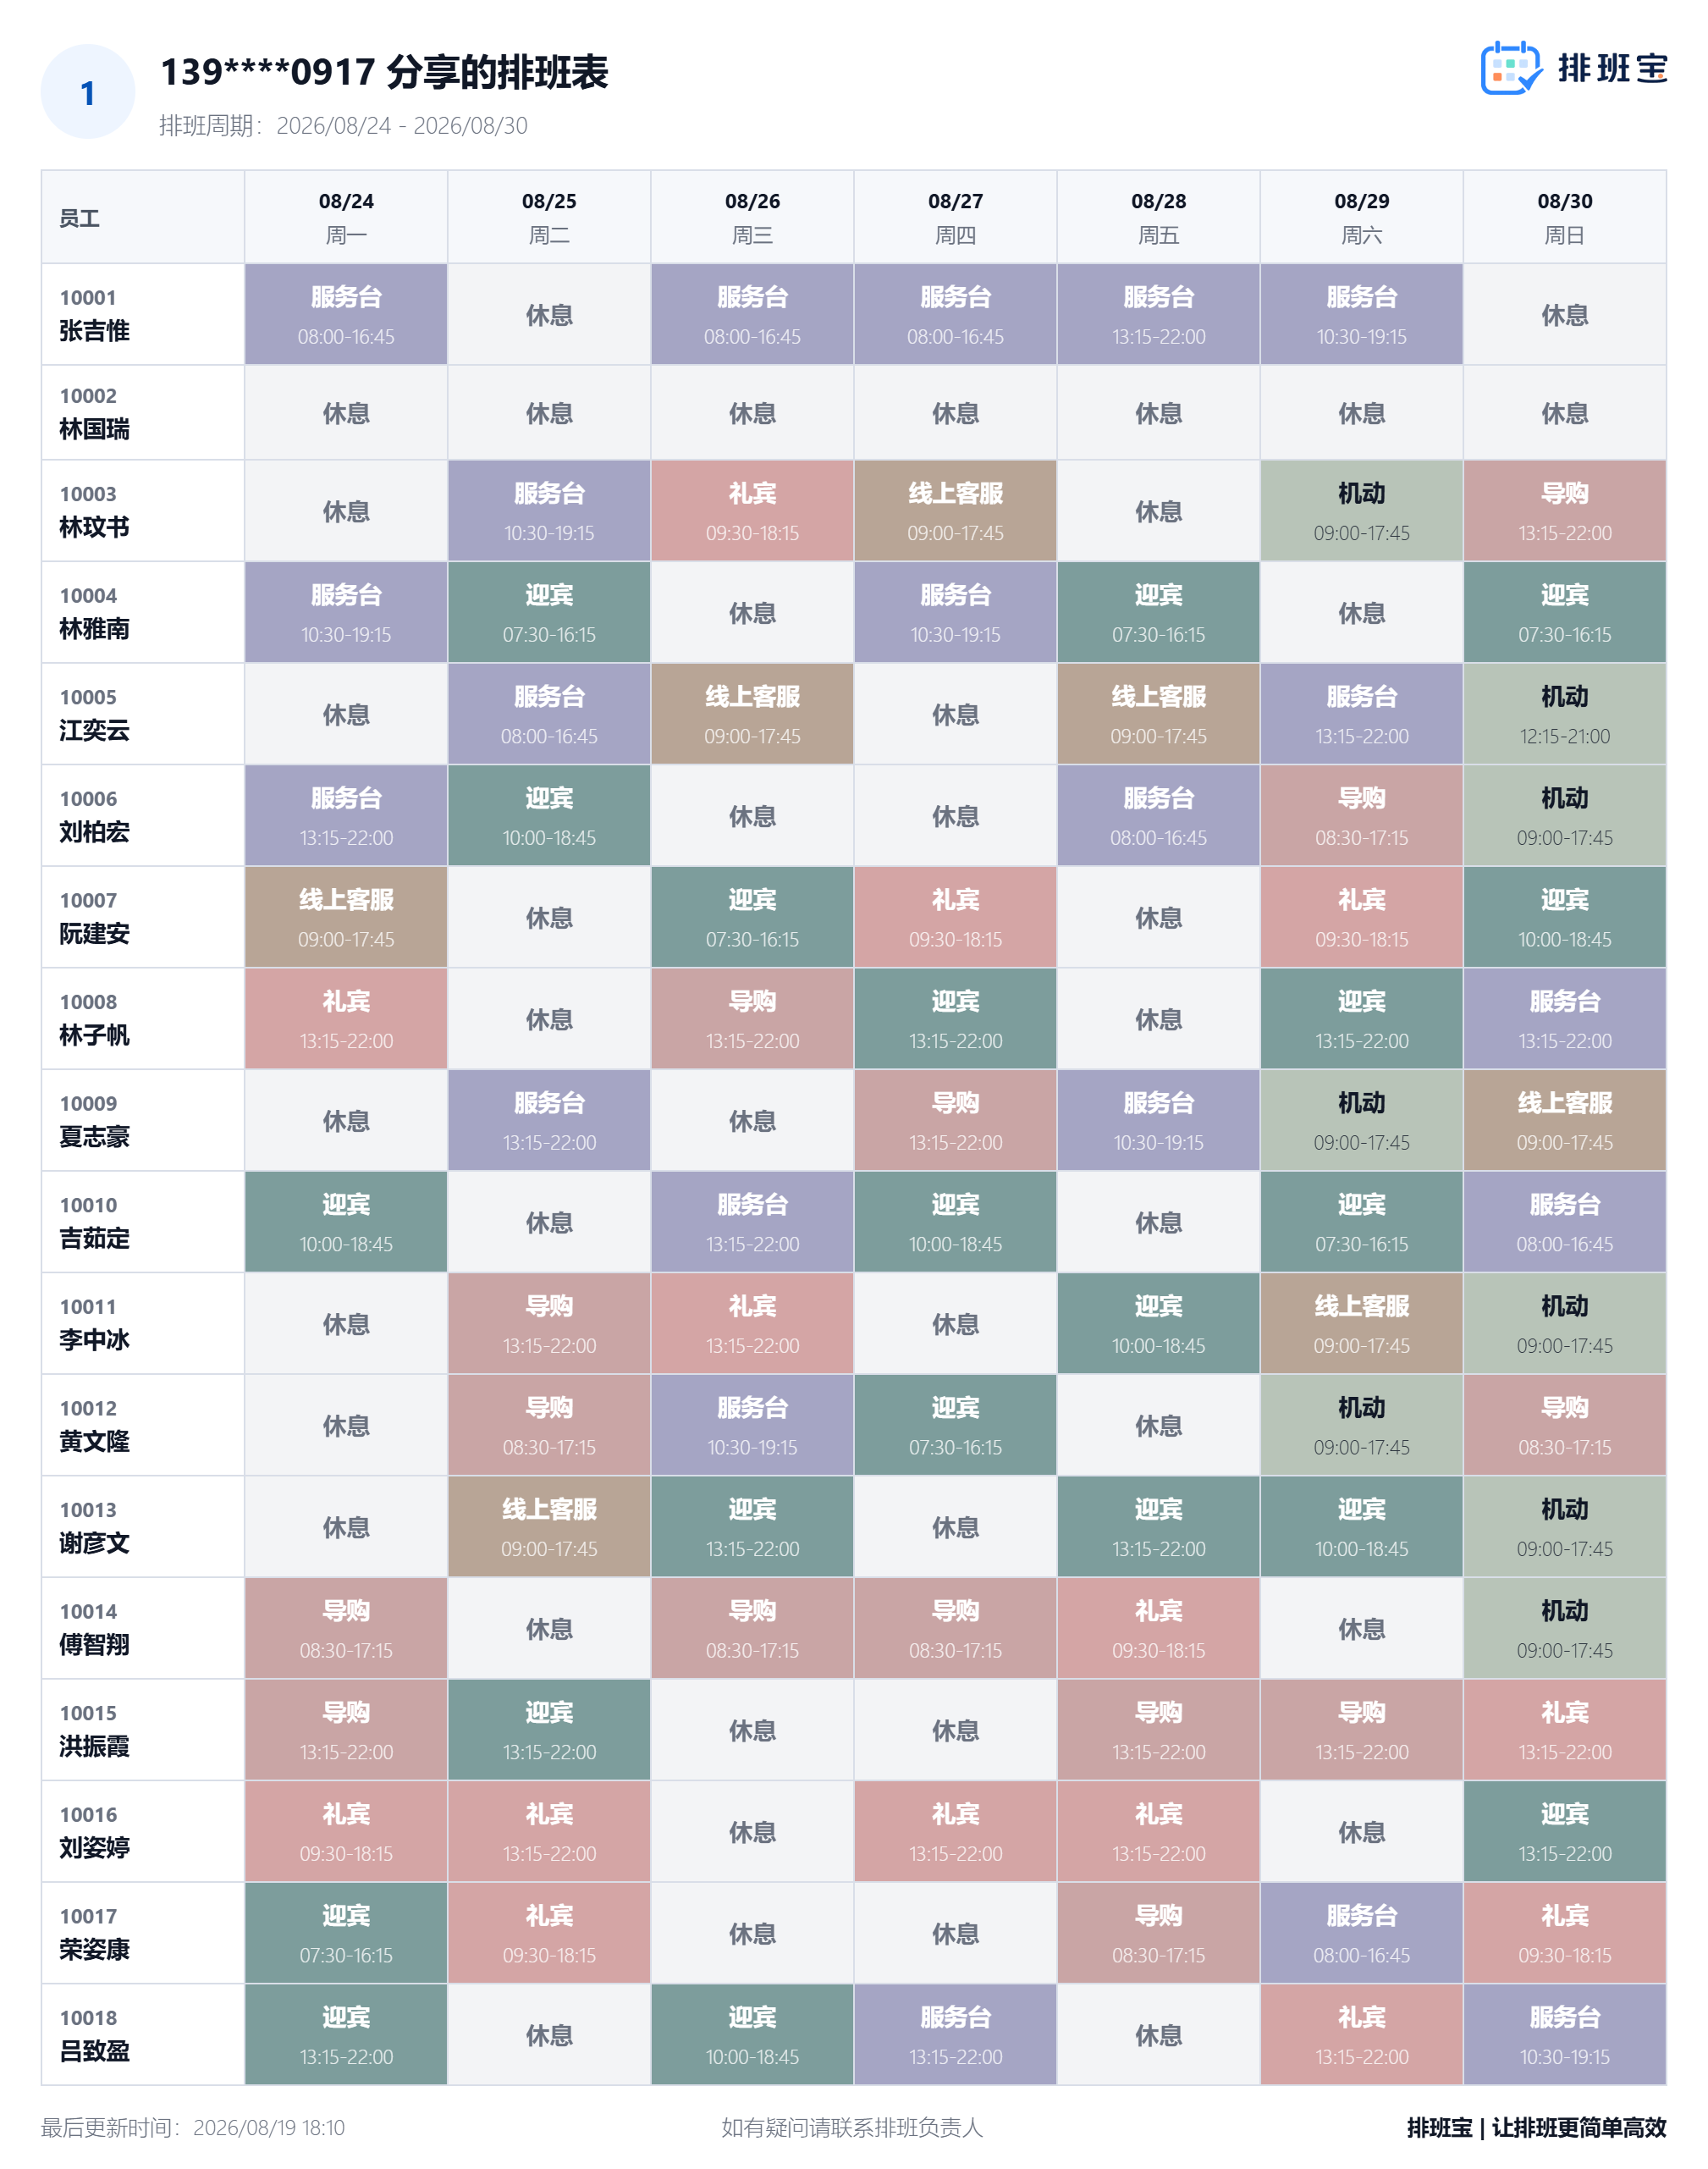
Click the “Export Excel” or “Export image” button in the upper-left corner of the schedule table to export the complete schedule as an Excel file or image: